It was finally time to put the Sparkfun Papa Soundie to work. The Sparkfun hook-up guide provides most of the details – a 3.3v ATmega328P paired with the VLSI‘s VS1000D audio codec IC. They have created an Arduino library to control the VS1000D. This can be downloaded as a zip (archive version).
For the really adventurous there is VSIDE from VLSI to reprogram the firmware in the VS1000D – there are application examples, source code samples and additional PC tools available. We archived a copy of the VS1000D programmers guide.
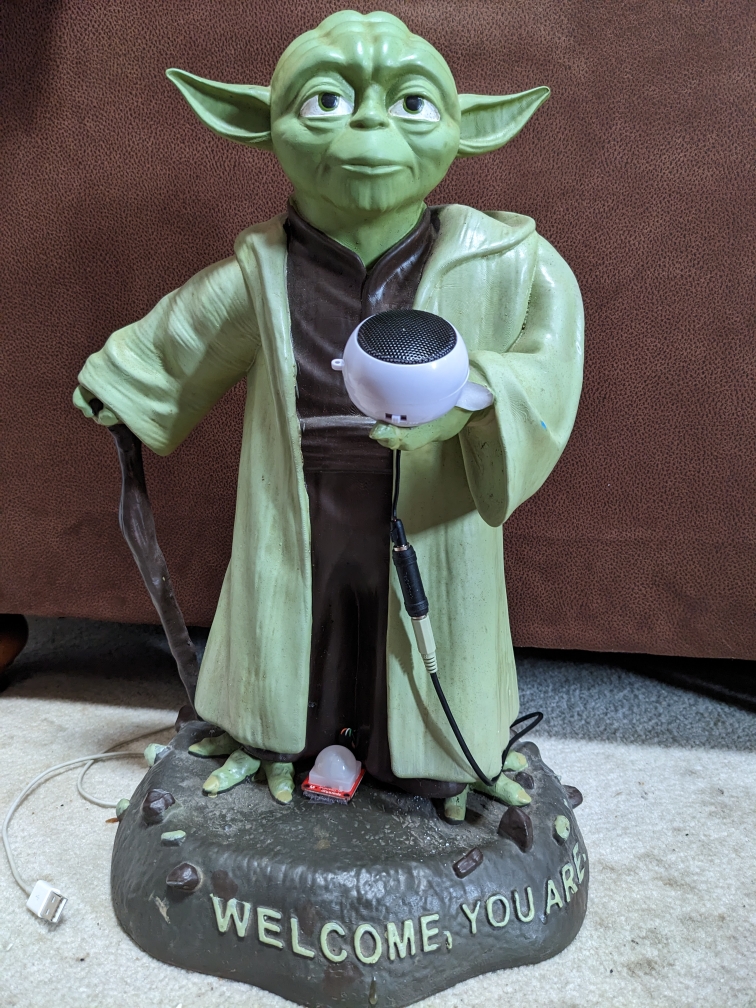
I supplemented the Papa Soundie with a small speaker and a PIR motion sensor, Sparkfun’s OpenPIR. The sensor is based around the NCS36000 PIR controller and will work with 3v to 5.75v. Sparkfun has created a hook-up guide, also.
Audacity made quick work of converting a few .wav and .mp3 sound clips of Yoda’s voice to the preferred Ogg Vorbis / .ogg format. The preinstalled firmware on the VS1000D wants to find files in either .ogg or .wav format on the microSD card. The files should be named AUDIOxx.OGG or FILESxx.WAV (xx is 00 thru 31). Unfortunately, you need to start with 00 and not skip any slots.
I based my project on the Hardware Example Project from the Sparkfun Hook-up Guide. I removed the code for the servo and added code to prevent immediate re-triggering and to randomly select the file to play. The random selection is configured not to repeat a file until all have played – card deal style.
#include "SparkFun_PapaSoundie.h"

  int motionStatusOld = LOW;
  int motionStatus = LOW;
  int sounds[] = {1, 2, 3, 4, 5};
  int len = 5;

#define PIR_DOUT 9

PapaSoundie sfx = PapaSoundie();

void setup() {
  Serial.begin(115200);  // Serial is used to view Analog out
  // Analog and digital pins should both be set as inputs (not actually necessary for Analog):
  pinMode(PIR_DOUT, INPUT);
  Serial.println("Getting ready");
  sfx.begin();
}

void loop() {
  int rnd;
  int choice;
  motionStatusOld = motionStatus;
  motionStatus = digitalRead(PIR_DOUT);
  if (motionStatus == HIGH && motionStatus != motionStatusOld) {
    if (len > 1) {
      rnd = random(len);
      choice = sounds[rnd];
      sounds[rnd] = sounds[len-1];
      len = len - 1;
    } else {
      choice = sounds[0];
      len = 5;
        for ( int i = 0; i < len; ++i ){
          sounds[i] = i+1;
        }
    }

    Serial.println(choice);


    sfx.playFileNumber(choice);
    delay(1000);
  }
}
The wiring is very basic – 5vdc and ground in on the VIN and GND pins, 3.3vdc and ground out to the sensor from the 3.3v and GND pins and the output of the sensor to pin D9.
Keep in mind the sensor does require a bit of time after power-up before being active. The LED on the sensor PCB will blink slowly during start-up. Once up and running the LED will indicate motion.
I think the next step might be to add an LED. Possibly the Sparkfun RGB addressable thru hole version. This is a thru hole 8mm version of the typical WS2812. Three are details in their WS2812 Guide. Adafruit has a very nice Arduino library for the WS2812.